Chick Brooder Guide: Setup, DIY Options & Tips For Success
Are you ready to embark on a rewarding journey of raising your own chicks? Creating a safe and comfortable environment for your baby chicks is paramount to their survival and healthy development.
A chicken brooder is, at its core, a secure and controlled environment meticulously designed for the initial weeks of a chick's life. It serves as their sanctuary, offering protection from the elements, predators, and the various dangers that lurk in the outside world. Within this haven, the chicks will reside until they develop the resilience to venture out on their own.
Beyond the basic structure, a brooder is much more. It's a climate-controlled zone, where you, the caretaker, can dictate factors like temperature, air quality, and hygiene. This level of control is crucial, especially in the early stages when chicks are incredibly fragile. Think of it as the equivalent of an incubator, but designed for the post-hatching phase.
This article is your comprehensive guide to the art of chick brooder setup, delving into the intricacies of creating a thriving environment for your feathered friends. We'll navigate the crucial components, from the structural aspects to the less obvious, yet equally important, considerations.
The very essence of a brooder is to mimic the warmth and security provided by a mother hen. Therefore, a primary focus is the provision of a reliable heat source. This could be a heat lamp, a radiant heat panel, or any other device that maintains a consistent temperature suitable for the chicks' needs. Beyond warmth, ventilation and air quality are of paramount importance. Adequate airflow prevents the build-up of harmful ammonia, which can lead to respiratory issues and other health complications.
Moreover, the ideal brooder setup encompasses the thoughtful arrangement of essential amenities, including feeders and waterers. These resources should be conveniently placed, enabling the chicks to easily access sustenance and hydration. A carefully chosen bedding material will also play a vital role in maintaining cleanliness and absorbing moisture, thereby promoting optimal health. The materials must be both absorbent and non-toxic.
Setting up a chick brooder involves more than just finding a box and adding heat. Each component ensures the chicks health, comfort, and growth. Choosing the location of your chick brooder is likely the first step for setting it up. Its important to put the brooder in a place that will be quiet most of the time, and will be safe. Chicks need to be protected from young children and your other pets.
Here's a quick rundown of a few DIY brooder options:
| Brooder Type | Description | Materials Needed | Pros | Cons |
|---|---|---|---|---|
| Baby Crib Brooder | A baby crib can be easily repurposed as a brooder, offering ample space for chicks. | Baby crib, chicken wire, cardboard or plywood, heat lamp or radiant heater, feeder, waterer, bedding material. | Provides a large, enclosed space; readily available; cost-effective. | Requires modification to secure the sides and top; needs proper ventilation. |
| Stock Tank Brooder | Utilizing a new or repurposed stock tank provides a sturdy and durable brooder option. | Stock tank, heat lamp or radiant heater, feeder, waterer, bedding material. | Durable; easy to clean; offers good protection. | Can be heavy; may require modification for heat source. |
| Cardboard Box Brooder | A simple and temporary solution, perfect for a small number of chicks. | Large cardboard box, heat lamp or radiant heater, feeder, waterer, bedding material. | Easy to assemble; inexpensive; readily available. | Less durable; susceptible to moisture; requires frequent cleaning. |
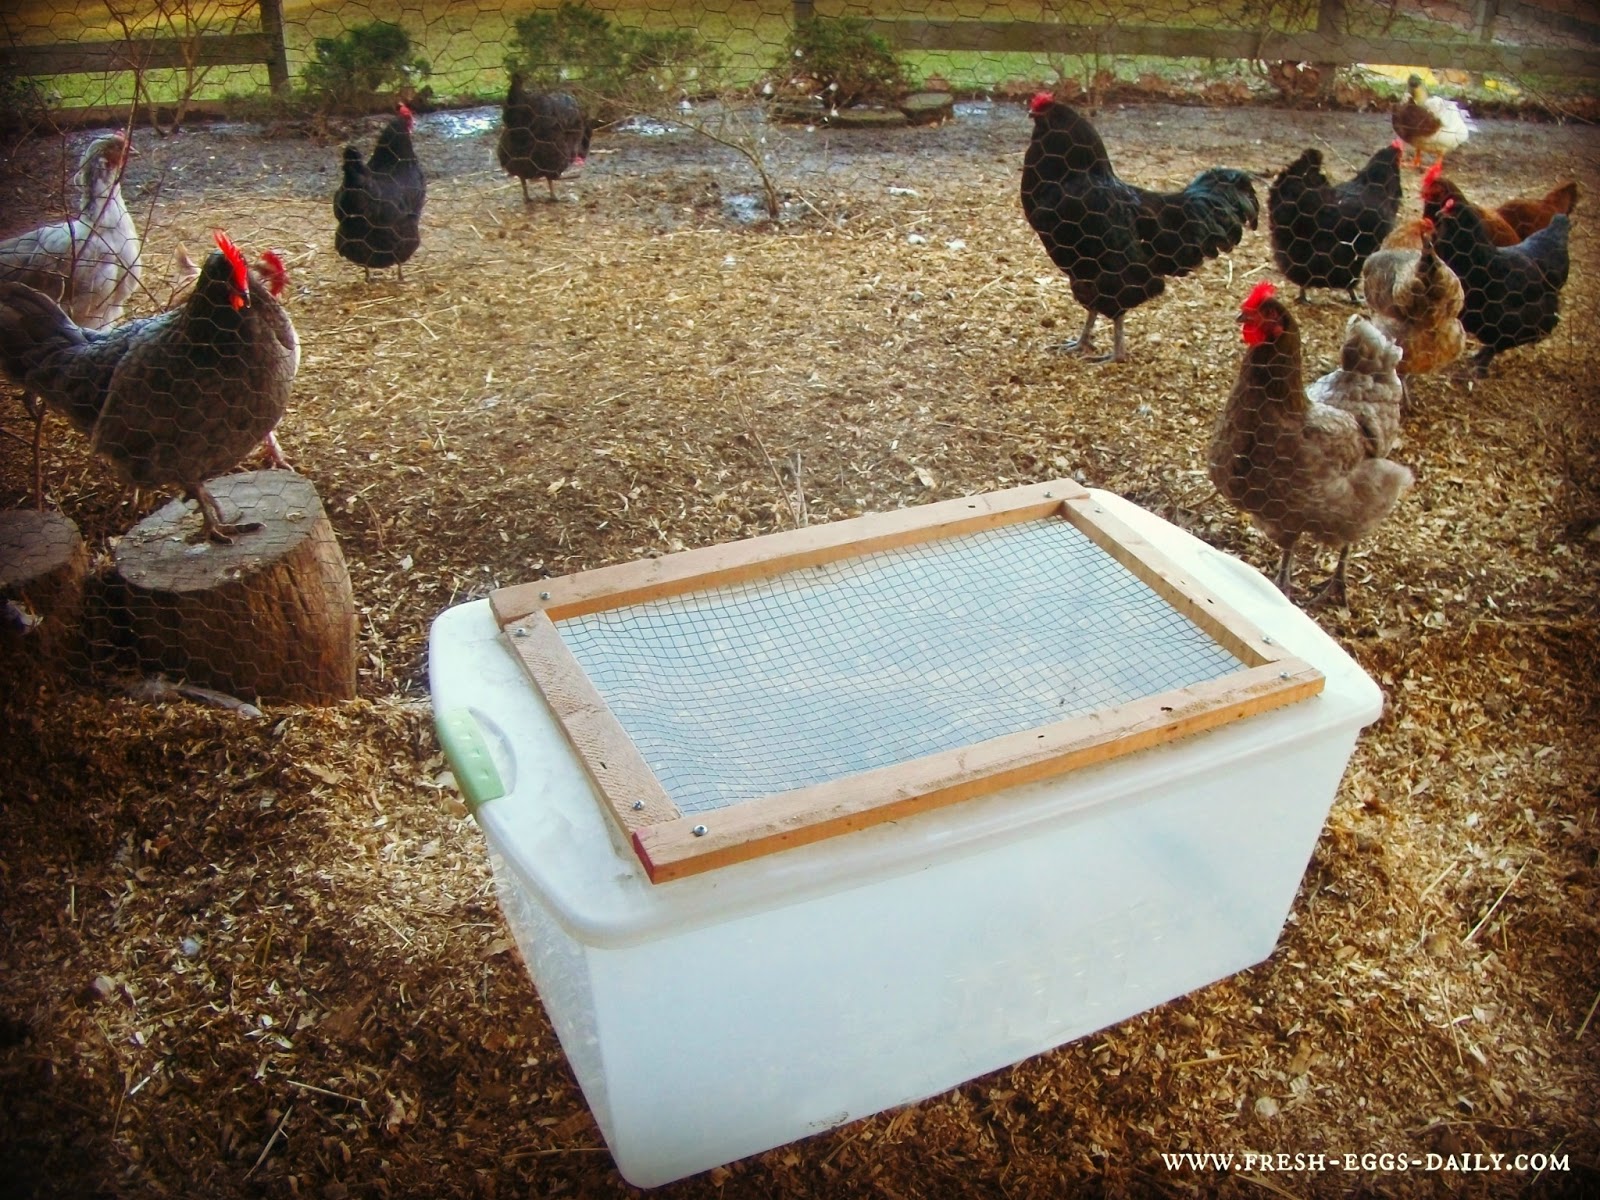
| Plastic Tote Brooder | A plastic tote can be easily transformed into a brooder, providing a lightweight and portable option. | Plastic tote, heat lamp or radiant heater, feeder, waterer, bedding material. | Lightweight; portable; easy to clean. | May require modifications for ventilation; not as durable as other options. |
| Dog Crate Brooder | A dog crate offers a secure and well-ventilated environment for chicks. | Dog crate, heat lamp or radiant heater, feeder, waterer, bedding material. | Good ventilation; secure; easy to move. | Can be smaller in size; may require modification for heat source. |
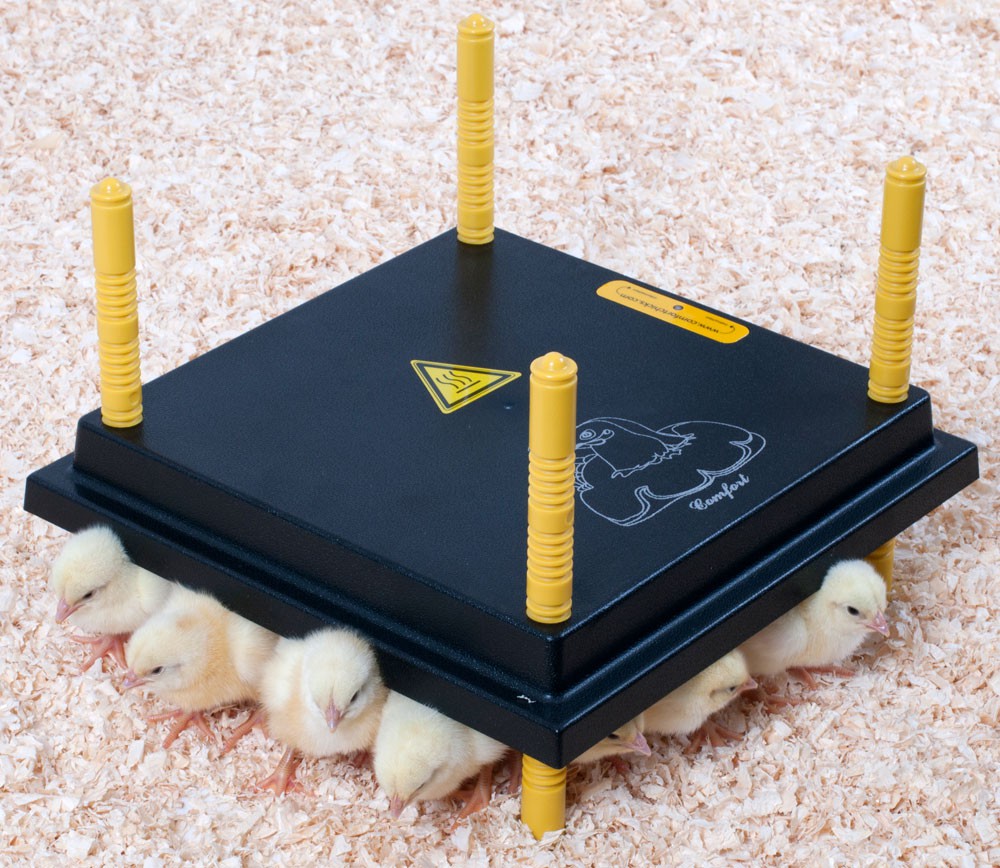
The "ecoglow radiant heat chick brooders" are best sellers and a top choice when brooding baby chicks.
These are just a few examples; your creativity is the only limit. The essential thing is to provide a safe, warm, and clean environment.
Brooders & accessories are readily available at tractor supply co., offering a convenient one-stop-shop for all your chick-raising needs.
When creating your brooder, remember that chicks require optimum housing and care for the first few weeks. This period is critical for their health and well-being, so every detail matters.
Your chicks will be happy, healthy, and safe in your care with these tips!
Let's delve into the core elements of chick brooder setup.
Selecting the ideal location for your brooder is the initial step. The chosen area should be sheltered from the elements, shielded from strong winds, and free from drafts. Furthermore, it's prudent to place the brooder in a location that's quiet, away from heavy foot traffic, and protected from potential threats, such as curious pets and young children. Safety is paramount. A secure location will minimize stress on the chicks and ensure their well-being.
Once you've identified the perfect spot, it's time to assess the available space and determine the appropriate size of the brooder. The dimensions of your brooder should be proportionate to the number of chicks you intend to raise. As a general guideline, allow approximately one-half square foot of space per chick. It is advisable to provide more space, if possible. This prevents overcrowding, which can lead to stress, feather pecking, and a higher susceptibility to disease. Moreover, it's imperative to consider the growth trajectory of your chicks. They will rapidly increase in size, so make sure the brooder offers sufficient room for their development.
The fundamental structure of the brooder can be fashioned from a variety of materials. Repurposed items like a baby crib, a large cardboard box, a plastic storage container, or even a livestock water trough (stock tank) can be effectively adapted. You can also construct a brooder from scratch using wood or plywood, if you have the skills and time. Irrespective of the material you choose, ensure that it's sturdy, safe, and easy to clean. The brooder should be sufficiently robust to prevent escape and to protect the chicks from external dangers.
Inside the brooder you will also find a heat source which will keep them toasty warm and allow them to thrive.
Essential equipment for the brooder comprises a heat source, feeders, waterers, and bedding. The heat source, which is crucial for maintaining the appropriate ambient temperature, could be a heat lamp or a radiant heat panel. Heat lamps, which provide localized heat, are a widely adopted choice, but they should be used with caution to mitigate the risk of fire. Ensure the heat lamp is securely mounted and properly positioned to prevent contact with flammable materials. Radiant heat panels, on the other hand, provide a more evenly distributed heat, which is often considered a safer option. They also consume less energy.
Feeders and waterers must be appropriate for chicks, meaning they are shallow and accessible, enabling the chicks to eat and drink without difficulty. Select a feeder that is designed to minimize feed wastage and a waterer that prevents spills. A dependable supply of clean, fresh water is essential. The bedding material should be absorbent, non-toxic, and comfortable for the chicks. Popular bedding choices include pine shavings, straw, or shredded paper. Avoid using materials like cedar shavings, which can release harmful fumes. Remember to replace the bedding frequently to maintain cleanliness and prevent the buildup of ammonia.
The temperature inside the brooder is of utmost importance and must be carefully monitored and regulated. Baby chicks are not capable of regulating their own body temperature effectively during their first few weeks of life. This is the reason why the brooder is required. Initially, the temperature in the brooder should be maintained at around 95F (35C). Gradually, over the course of the following weeks, the temperature can be decreased by approximately 5F (3C) each week, until it reaches the ambient outdoor temperature. You can use a thermometer to monitor the temperature, and adjust the heat source accordingly. Pay close attention to the chicks' behavior. If they are huddled together, they are likely cold and require more heat. If they are spread out and panting, they are too hot and need the heat source adjusted.
Adequate ventilation within the brooder is another important consideration. It prevents the buildup of ammonia and other harmful gases, which can negatively impact the chicks' health. Ensure that the brooder has adequate ventilation by providing openings for air circulation. Avoid placing the brooder in a location that is completely sealed, as this can impede airflow. While ensuring proper ventilation, you must also prevent drafts. Drafts can chill the chicks, making them susceptible to illness. Protect the brooder from drafts by placing it in a sheltered location or by using windbreaks.
The chicks are very fragile babies, requiring optimum housing and care for the first few weeks.
Keeping the brooder clean is essential for the health of your chicks. The bedding should be replaced frequently, ideally at least once a week, or more often if needed. Remove any wet or soiled bedding immediately. Cleaning the feeders and waterers daily is also critical, ensuring that they are free from contamination. Use a suitable disinfectant to thoroughly clean the brooder periodically. This will help to eliminate any bacteria or parasites that could threaten the health of your chicks.
The design of your brooder should emphasize security and safety. The structure itself must be sturdy enough to withstand any accidental impacts. Ensure that the sides of the brooder are high enough to prevent the chicks from escaping. If using a heat lamp, make sure it is securely mounted and properly guarded to prevent accidental contact. Position the brooder in a location where pets and children cannot gain access. Keep in mind that predators, such as rodents, can also pose a threat to your chicks, so take measures to protect them from any potential predators. The best option is always to ensure the brooder is entirely covered and secured.
For the first few weeks, a brooder is an essential piece of equipment to hatch and raise chicks yourself. You can also learn what a brooder entails and its functions. It's important to put the brooder in a place that will be quiet most of the time, and will be safe.
The goal is a successful transition from incubator to brooder. The following topics also need attention:
- How long the chicks should stay in the incubator;
- How to remove them while others are still hatching;
- What to do about gunk;
- And what happens when a chick can't get dry.
Once your chicks have developed enough to thrive outside (typically around 6-8 weeks, depending on the weather and the breed), you can begin the process of transitioning them from the brooder to their permanent home, the coop. This process should be gradual to allow the chicks to acclimate to the new environment and to reduce stress. Start by allowing the chicks short periods of time outside the brooder, in a secure, protected area. Gradually increase the amount of time they spend outside until they are fully accustomed to the coop. Always monitor the chicks during the transition period, and make sure they have access to food, water, and shelter.
Brooding baby chicks, while undeniably fulfilling, demands meticulous attention to detail. From the initial selection of materials to the ongoing maintenance of the brooder, every aspect contributes to the chicks' health, comfort, and growth. By heeding these guidelines and adapting them to your unique circumstances, you can establish a thriving environment that gives your chicks the best start in life and sets the stage for a successful and gratifying experience of raising chickens.
With these tips, your chicks will be happy, healthy, and safe in your care!
With a little chicken wire and cardboard or plywood, a baby crib can make a great chick brooder.
This is probably my favorite quick diy chick brooder option and the one weve used the most over the years.

